Herringbone Stitch Pattern From Down Home

There are several different ways to make a herringbone pattern. Occasionally I get pattern support queries about the one used in my Down Home pattern so I’ve created this tutorial to help people out.

By far the most common issue people have when swatching is that they are getting a lacy pattern instead of a herringbone pattern. Before I begin I want to address how to fix that. If this is happening to you the problem is with the number of stitches you have on your needles. The pattern is worked over a multiple of 3 plus 1. If you cast on a multiple of 3 the yarn overs will stack on top of each other and open up into something that does not at all resemble herringbone. Casting on an extra stitch should clear it right up.

Now that that’s out of the way, here is how to create the herringbone pattern from Down Home:

DHI1.JPG

Knit the first stitch. [Note: We are just swatching here. The actual pattern has a selvage stitch in stockinette at either side of the row. If you are trying this on the actual sweater and not a swatch knit the first two stitches, one for the selvage and one to begin the pattern.]

DHI2.JPG

Next, make a Yarn Over by bringing the working yarn from the back to the front and around the right hand needle.

DHI3.JPG

Next, with the yarn held in back slip the next stitch on the left hand needle as if to purl.

DHI7.JPG

Now knit the next two stitches on the left hand needle.

DHI8.JPG

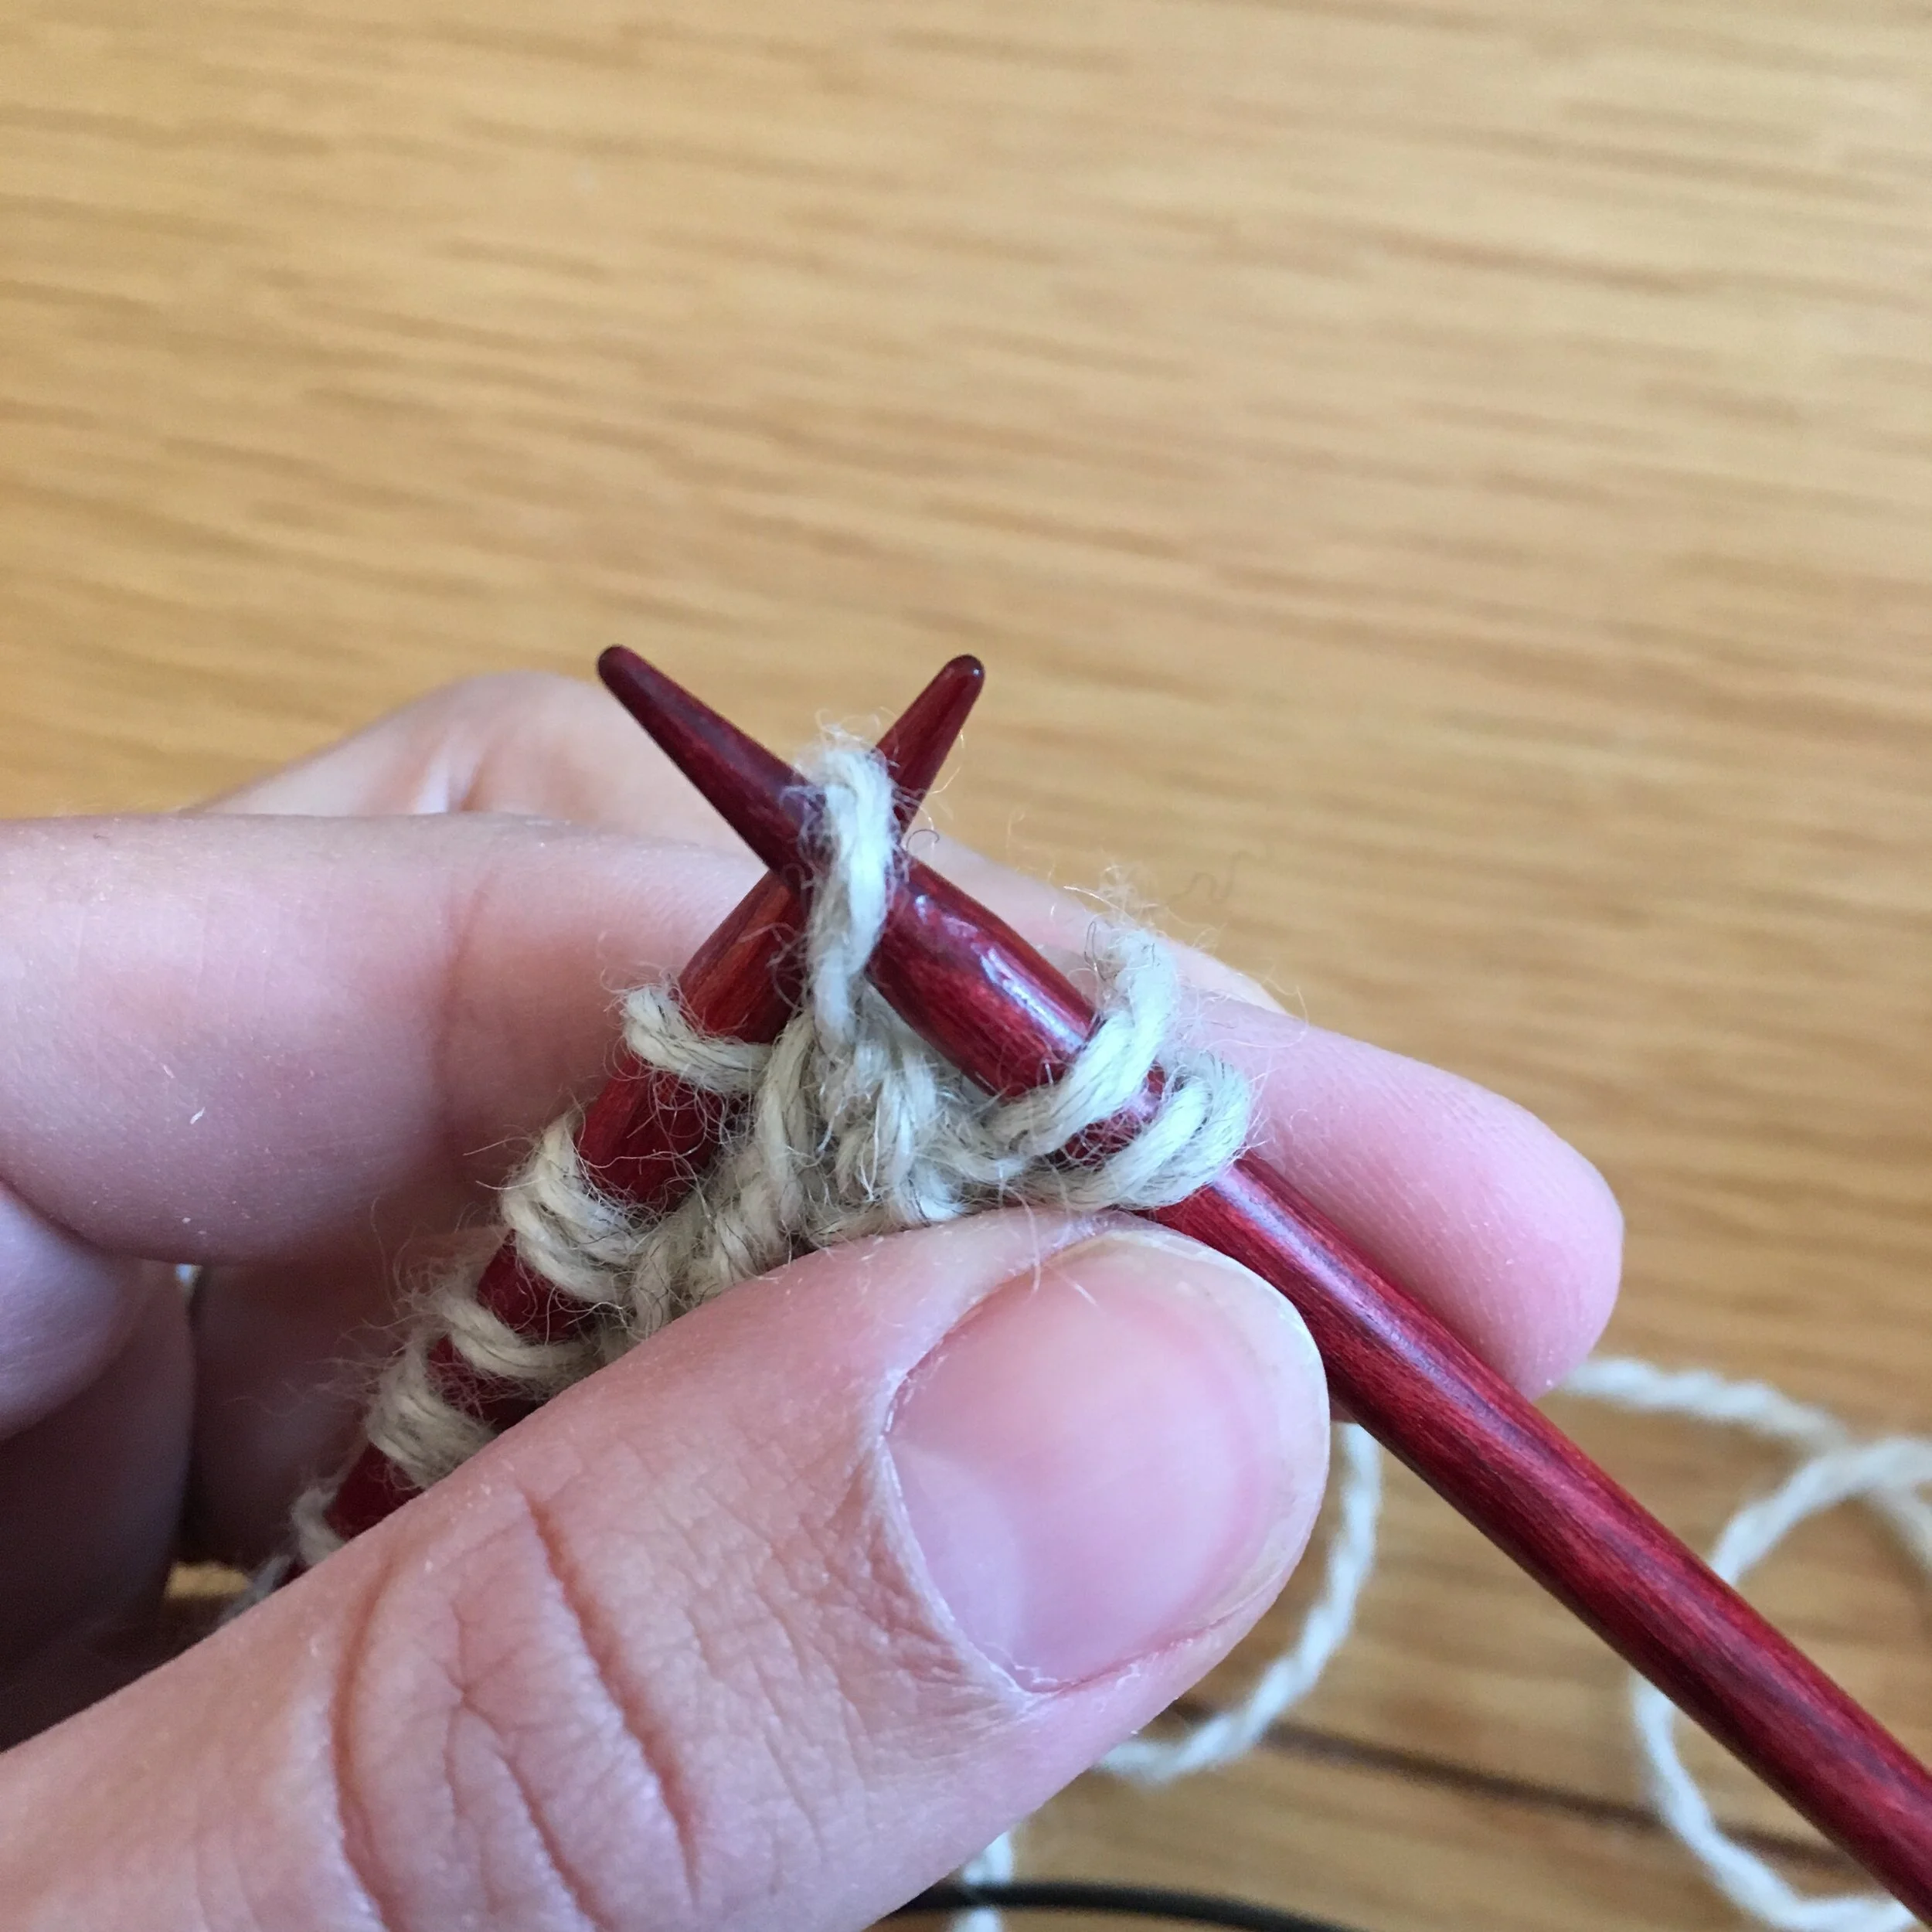
Insert the tip of the left hand needle into the front of the slipped stitch. Then pass the slipped stitch over the two knitted stitches. Your work will now look like this:

DHI9.JPG

Repeat these steps from the yarn over until you have reached the end of the row. Do not repeat the initial knit stitch from the beginning of the row.

DHI10.JPG

The right side should look like this. Now flip your work over so that the wrong side is facing you.

DHI12.JPG

Purl the first stitch. [Or the first two stitches to account for the selvage if you are working on the sweater instead of a swatch.]

DHI13.JPG

Make a yarn over by taking the working yarn over the top of the right hand needle and bringing it around back towards the front of your work.

DHI14.JPG

With the working yarn in being held in front, slip the next stitch as if to purl.

DHI15.JPG

Purl the next two stitches on the left hand needle.

DHI16.JPG

Insert the tip of the left hand needle into the back of the slipped stitch. Pull it over the two purled stitches and drop it off of the needle.

DHI17.JPG

Your work should now look like this. Repeat these steps from the yarn over until you have finished the row.

DHI11.JPG

Once you’ve finished the wrong side should look like this. That’s it! Flip the swatch back over the the right side and repeat the instructions above.

Changing the length of a sleeve

Let’s talk sleeves.

I recently conducted a survey about alterations that knitters regularly make to a knitting pattern for a better fit.  One of the most frequent answers was either shortening or lengthening the sleeves. 

If this is an alteration you need to make but you’re not quite sure how to go about it read on and fear not.  Recalculating the increase or decrease rate for a sleeve is relatively easy and straight forward.

[Note: For the purposes of this explanation we are assuming that the sleeve is knit top down.  It works exactly the same way for a sleeve knit from the cuff up, just substitute the word increase for everywhere it says decrease.]

The tapered sleeve on Knife Grinder’s Daughter.

First count up the total number of sets of decreases in the sleeve.  If the pattern doesn’t make this immediately evident or you are also adjusting the stitch count somewhere along the line you can do this by subtracting the number of stitches at the wrist from the number of stitches in the upper arm and divide by two.

Second determine how long you want the sleeve to be.  Subtract the length of the cuff from this number. 

Then determine how many rows you will have in the sleeve by multiplying the desired length (minus cuff) by the row gauge. 

To get a rough idea of how often you should work a decrease row divide the total number of rows by the number of decrease rows.

To Summarize:

(Number of stitches at upper arm – number of stitches at the wrist) / 2 = total number of decrease rows

(Desired Length of sleeve – length of cuff) x row gauge per inch or cm = total number rows in sleeve

Total number of rows in sleeve / total number of decrease rows = how often to work a decrease row

Unless you get lucky, the final number probably isn’t going to be a whole number.  Round this number down and work any remaining rounds after the last set of decreases but before the cuff.

You can use this method even if you are also adapting the pattern to fit your arms in some way.  For example, if you have bigger biceps and don’t want to begin tapering the sleeve until the point where your arm actually begins decreasing, you can use this easily.  Simply measure your arm from the point where you want to begin decreasing to your wrist.  Use this number in place of the desired sleeve length when determining the total number of rows available for decreasing. 

Tutorial: Knitting on a Cabled Edge

This tutorial will walk you through knitting on the cabled edge of my New Kid Cardigan. This is far from the only way to knit on and edge.  I chose it because it works well with the garter stitch and cable used in this pattern.  If you are using this method for a different project you might want to try knitting an edge onto your swatch to see if you like how the join looks before you begin.

Read More

Tutorial: Joining the thumb to top-down mitts

My Badlands Mitts are knit top-down in order to use up every bit of your leftover yarn. The thumbs are knit separately and later joined to the body of the hand in the same manner that you would join the sleeves of a raglan or yoked sweater when knitting from the bottom-up.  This tutorial will walk you through joining the thumb and hand of a top-down fingerless mitt. 

Read More